|
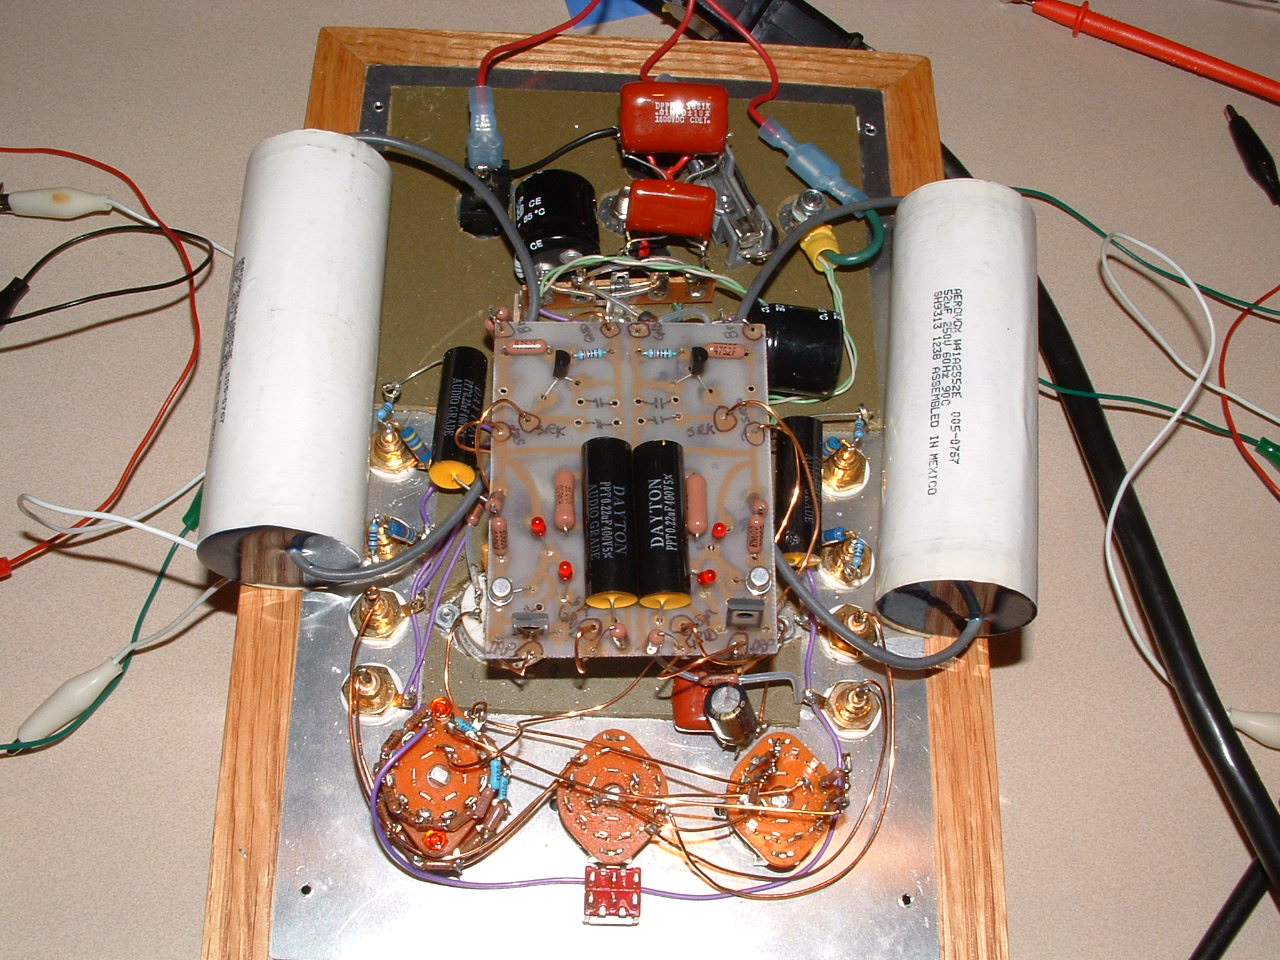
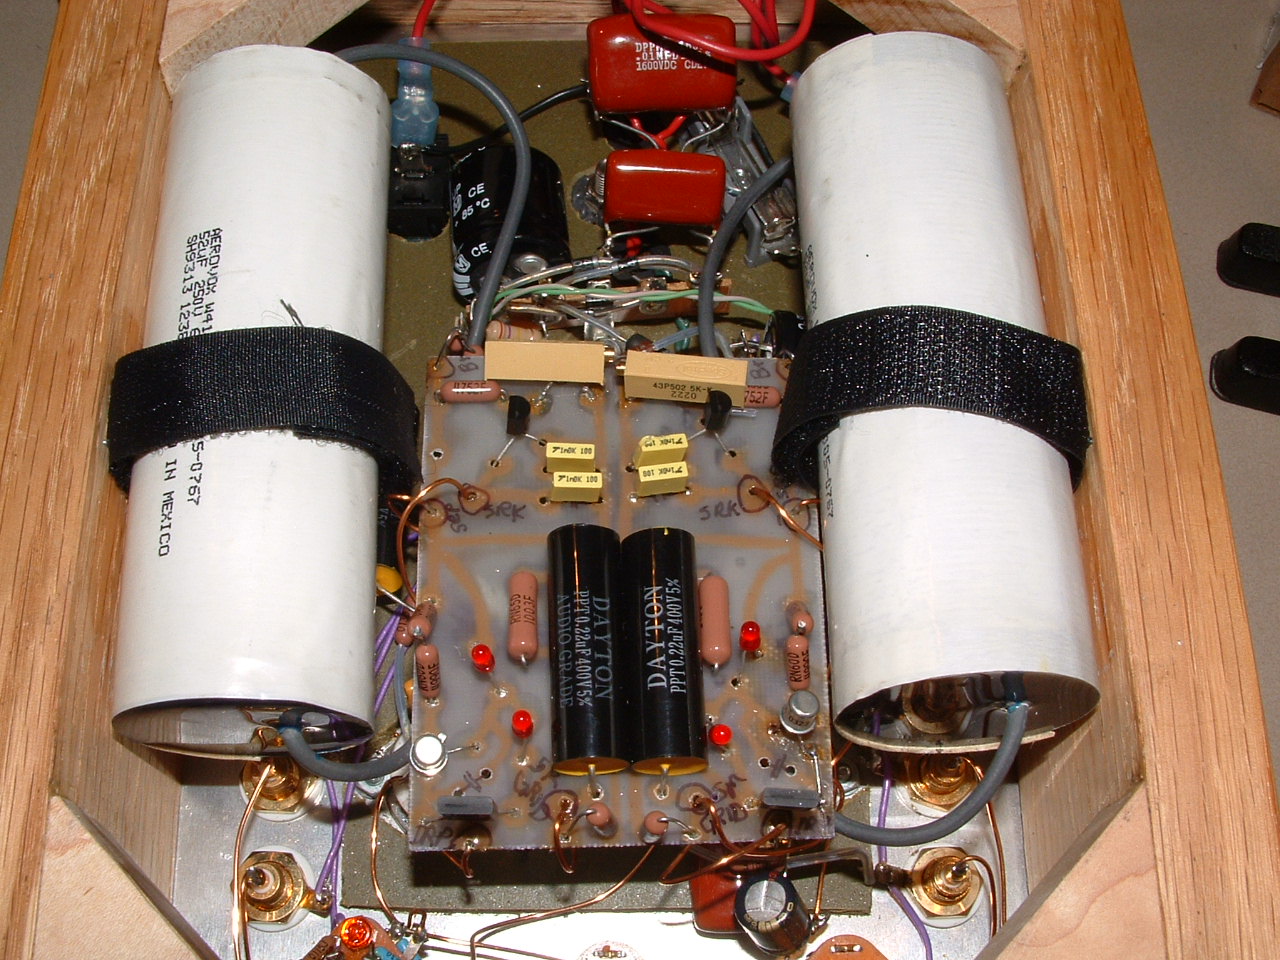
This page gives several large-kilobyte detail pictures . Sorry it takes so long to load -- but if you're thinking
about doing this yourself, you will need the information.
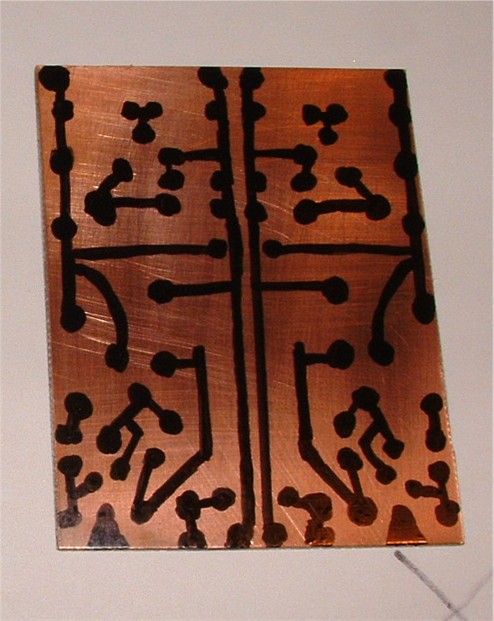
This project is a little bit harder than building and installing the C4S, but not that much. You have to build
your own circuit board, but you can get a kit from Radioshack for $15 that gives you everything you need, and it's easy.
You can get the rest of the parts from Mouser, Digikey, or whomever, for just a few bucks total.
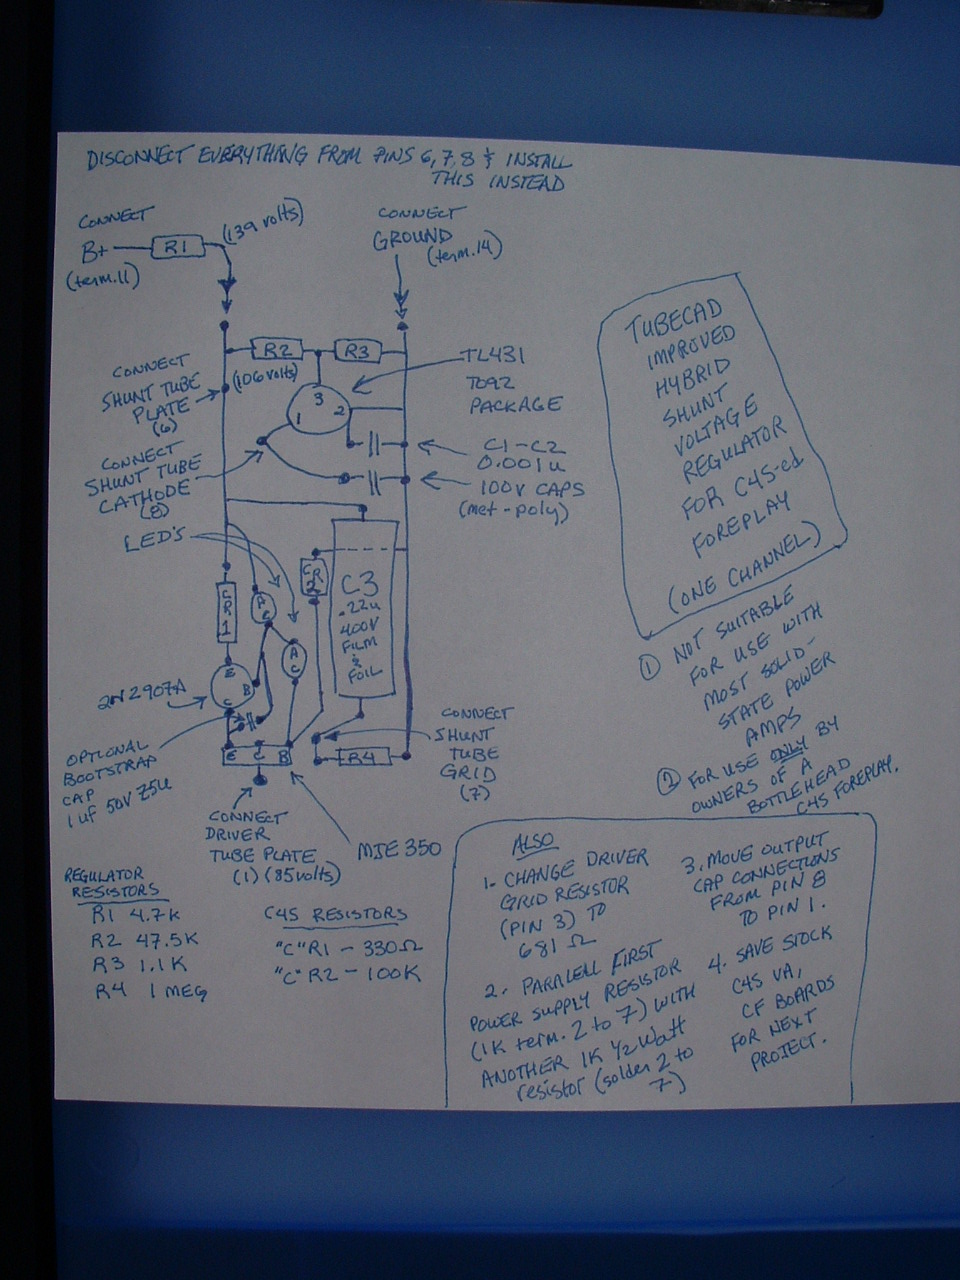
You eliminate the cathode follower from the stock Foreplay circuit, and use those triodes for the voltage regulators.
This gives the amp a high output impedence, so it will not work with most solid-state amps. It's only for high-input-impedence
tube amps. I'm using 1 - 2 meter interconnects with no problem at all.
Also, this modification is only for owners of the Bottlehead Foreplay preamp with Anticipation upgrade.
Everybody else please move along now -- nothing to see here.
Watch out. Modifying tube amps can kill you dead and it's not my responsibility to you our your heirs.
A couple of notes since I posted this stuff. First, the cap I show on the picture below
from pin 2 of the TL431 regulator to ground really should go from pin 3 of the TL431 regulator to ground. Ooops.
Also, I now omit this cap entirely, since it seems to cause shrill treble in some applications -- so you can still
copy the board layout I show on the copper board below, and just leave out the cap.
Second, the pin-out on all TL431 chips is not the same, even if they're in the same TO92
package I used. The cathode of the TL431 goes to the cathode of the shunt tube triode, anode of the TL431 goes to ground,
and the remaining (voltage regulating) terminal of the TL431 goes to the voltage divider at R2-R3.
Third, the "optional bootstrap cap" I show at the bottom of the C4S is in the wrong place.
I'm now using a 6 volt 1000uf electrolytic, with the + connected to the anode of the top LED and the - connected to the cathode
of the bottom LED. There is no provision for this on the copper board layout I show below, so you'll need to add some
ink accordingly before you etch.
|
|
|